


We want to show you how easy it is to bundle a Meteor application as an Android app. Use the same code-base and get a snappy app on top. We will tell you about the required prerequisites and steps.
Updated for Android SDK 26
We have collected the steps for Linux users, but they should be similar on macOS and Windows - comments are welcome!
First, install Android command line tools, they include a slim GUI application to manage further SDK packages. You can also install the full Android Studio. I chose /opt/android-sdk as my extraction path.
If you use Arch Linux like we do, you can simply install the AUR packages android-sdk and android-sdk-platform-tools. These packages will also take care of your environment variables, so just open a new shell and skip the next step. Make sure you have installed gtk2 via pacman, too; It’s an optional dependency of swt (which is a pacman dependency of android-sdk), but you need it if you want to use the GUI application aforementioned.
Set some environment variables:
1 2 | export ANDROID_HOME=/opt/android-sdk export PATH=$PATH:$ANDROID_HOME/tools:$ANDROID_HOME/platform-tools |
You may want to make these variables persistent.
If you want to use a GUI application you can install Android Studio and install the respective platform tools:
Click Deselect all and just install latest Android SDK Platform-tools, Android SDK Build-tools and SDK Platform.
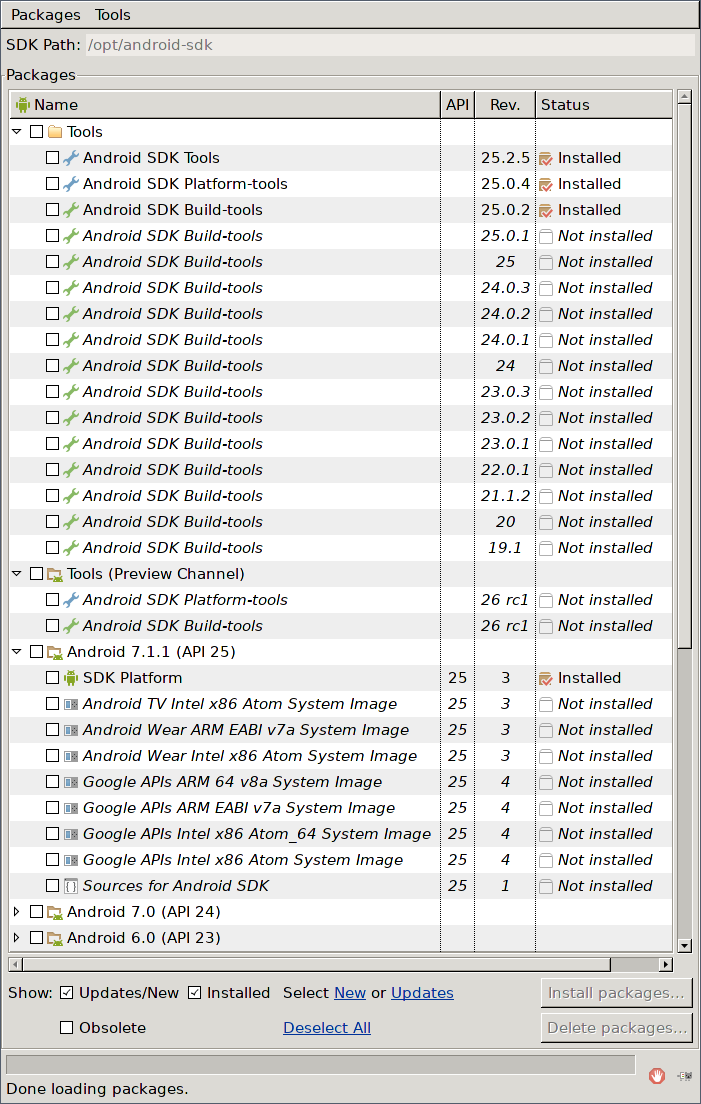
Otherwise use /opt/android-sdk/tools/bin/sdkmanager:
1 2 3 4 5 6 7 8 9 10 11 | sdkmanager --list # Which outputs: # # build-tools;26.0.3 | 26.0.3 | Android SDK Build-Tools 26.0.3 # ... # platforms;android-26 | 2 | Android SDK Platform 26 # ... # tools | 26.1.1 | Android SDK Tools sdkmanager "build-tools;28.0.3" sdkmanager "platforms;android-28" sdkmanager "tools" |
Open a terminal and cd to your Meteor application. If you don’t have one right now, you can use the Todo app from the Meteor tutorial. Within your Meteor project, run
1 | meteor update |
to make sure that you’re using the latest version of Meteor. Add Android as a build target for your Meteor application with
1 | meteor add-platform android |
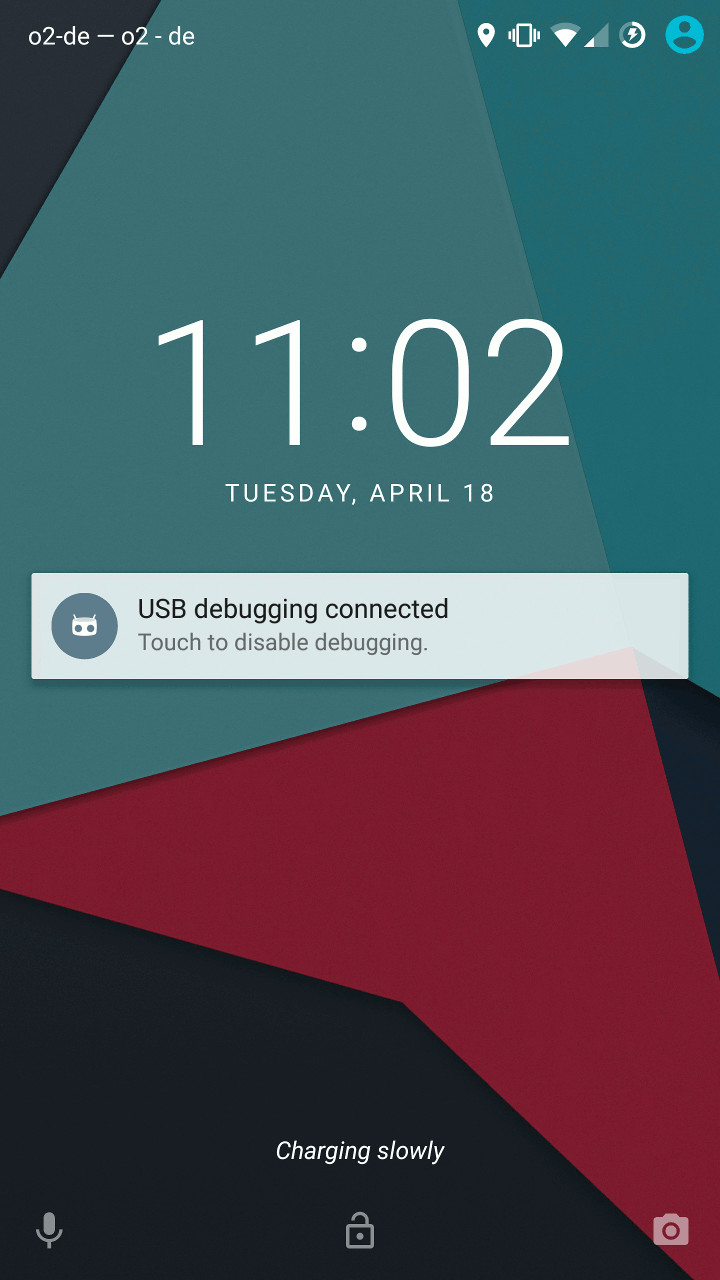
Now connect your Android phone via USB. A new notification should appear telling you USB debugging is now enabled. It this is not the case, you need to enable debugging on your Android phone. Make sure it runs at least Android 4.4.4 and is connected to the same Wifi network as your computer.
Run
1 | meteor run android-device |
to install and start the app on your physical device.
That was easy, wasn’t it? In upcoming blog posts, we’ll show you how to get your Meteor app into Google’s Play Store and Apple’s App Store. You can also check out the comprehensive Meteor Mobile Guide for more detailed information.